What you will discover in this article
In this article, you will discover the history of Tarte Tatin and its legendary origins, understand what sets it apart from a classic apple pie, learn the traditional recipe step by step, and discover essential tips for achieving perfectly caramelized apples and a successful pastry.
What is the history of the Tarte Tatin?
The Sologne. A magnificent land of forests. La Motte Beuvron, in the department of Loiret. Home to two sisters who run a restaurant: the Tatin sisters. Caroline and Stéphanie. And business is booming at the end of the 19th century. So much so that they are overwhelmed. Especially Stéphanie, who does the cooking. Caroline is constantly pressuring her. Particularly on this day, when she bursts into the kitchen shouting that dessert must be served to customers who have been waiting too long.
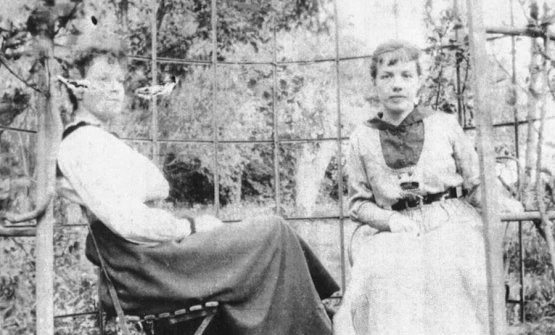
On the left, Caroline; on the right, Stephanie TATIN source: Wikipedia
There are two explanations for the origin of Tarte Tatin.
Stephanie drops her pie.
Stephanie is stressed out. She wants to make dessert quickly and rushes to the oven with an apple pie. Clumsy, due to stress, the pie falls on the floor. And, pressed for time, Stephanie reacts quickly. She picks up the apples, arranges them in the dish, adds a little butter, and covers the dish with the pastry that was originally underneath.
Or Stephanie is in love
In the second option, it's more romantic. While Caroline is busy serving customers in the dining room, Stephanie is in the kitchen chatting with a handsome guy who tells her about Fleurette. He's so talented that she forgets to prepare dessert. So she improvises to make a quick and easy dessert. She takes some apples and sautés them in a pan, adds butter, and covers everything with some pie crust she had prepared.
In both cases, the customers taste it. They love it. And the Tatin sisters' tart, which was basically a culinary mistake, becomes famous. What makes it so successful! History does not tell us whether Stephanie had her little sensual affair with the handsome man...
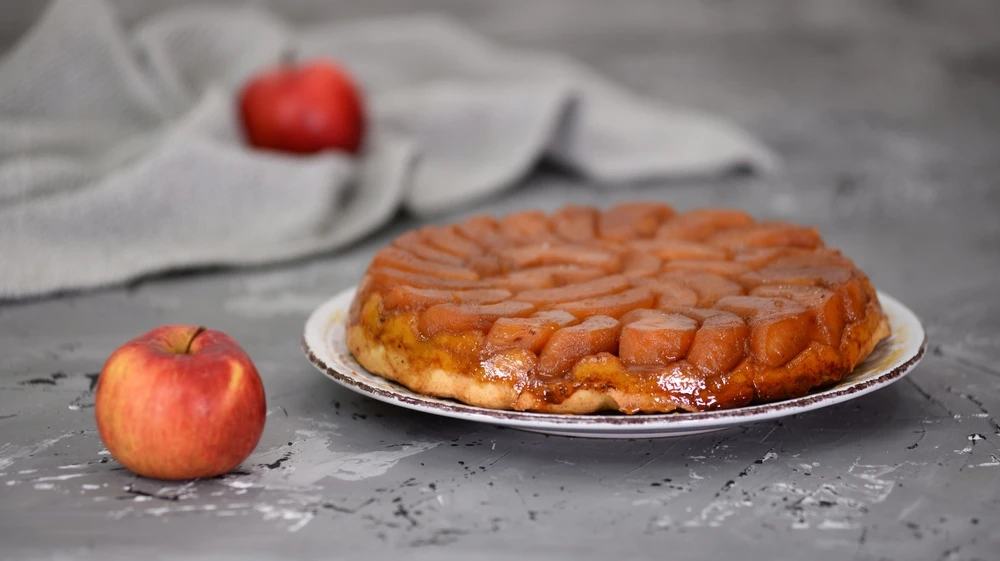
A Tarte Tatin / photo by Mariko151825/Shutterstock.com
Why is tarte Tatin different from a classic apple pie?
Tarte Tatin is distinguished by its inverted baking method. Unlike a traditional apple pie, the apples are stewed in butter and sugar, forming a rich and fragrant caramel. Before baking, the dough is added on top of the fruit, then the tart is flipped over after baking, giving it its unique appearance and texture.
What ingredients are needed for a traditional Tarte Tatin?
The traditional recipe for tarte Tatin uses very few ingredients.
You will need:
-
Apples
-
Butter
-
Sugar
-
Shortcrust or puff pastry
The quality of the apples and the mastery of the caramel are essential to respect the spirit of the recipe.
Which apples should you choose for a Tarte Tatin?
The choice of apples is crucial to the success of a Tarte Tatin.
The most suitable varieties are:
-
Queen of Reinettes
-
Golden
-
Boskoop
These apples hold up well when cooked, melt without falling apart, and go perfectly with caramel.
Traditional recipe for Tarte Tatin
Ingredients
- 8 apples (preferably Golden Delicious, Boskoop, or Reinette)
- 1 roll of puff pastry
- 100 grams of powdered sugar
- 100 grams of butter
- 2 packets of vanilla sugar
- 1 or 2 scoops of vanilla ice cream.
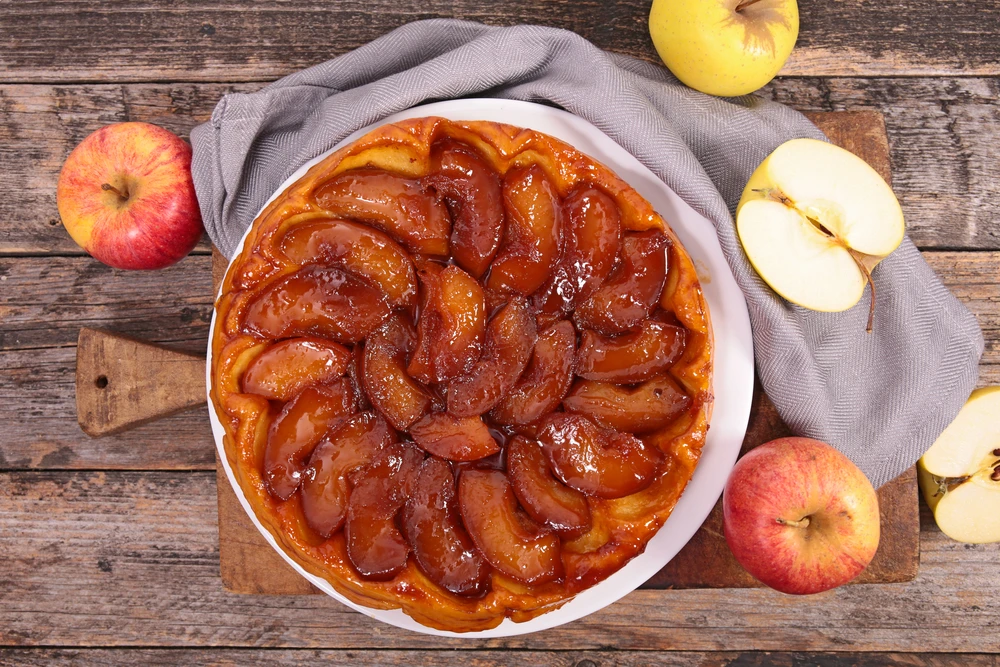
A Tarte Tatin / photo by margouillat photo/Shutterstock.com
The step-by-step process
- Start by preheating the oven to 180 degrees.
- Wash and peel your apples, removing all the seeds.
- In a pan, melt 100 grams of butter, then add the sugar while stirring. You will obtain caramel when it starts to bubble a little.
- Leave the caramel at the bottom.
- Over low heat, arrange your apple slices on top (be careful, it's hot!) in a rosette pattern.
- Let the apples cook a little with the caramel.
- Sprinkle everything with the contents of the vanilla sugar packet.
- Remove from heat.
- Cover your mold with the roll of puff pastry.
- Bake for 40 minutes and keep an eye on the dough; it will be golden brown when it is ready.
- Remove the pie from the oven and wait 5 minutes.
- Carefully remove from the mold.
- Serve warm with a scoop of vanilla ice cream.
Tips for making the perfect Tarte Tatin
-
Do not stir the caramel while cooking.
-
Pack the apples tightly into the pan.
-
Choose a thick pan for even cooking.
-
Flip the pie while it is still warm, but not hot.
A good tarte Tatin should be shiny, melt-in-the-mouth, and well caramelized.
The savory version of tarte Tatin is also delicious.
Tarte Tatin isn't just for desserts: the technique also works perfectly with savory dishes. The principle remains the same: ingredients are cooked and caramelized in the bottom of the pan, covered with pastry, and then flipped over after baking. You can make a Tarte Tatin with tomatoes, onions, shallots, or even endives, with a melt-in-the-mouth, flavorful result. Cheese versions work very well, especially with goat cheese, Camembert, or Comté, sometimes combined with vegetables. Savory Tarte Tatin offers an original and delicious alternative, ideal as a starter or main course accompanied by a green salad.

FAQ – Tarte Tatin
What is the origin of the Tarte Tatin?
The Tarte Tatin is said to have originated in Lamotte-Beuvron, in the Sologne region, at the end of the 19th century. It is associated with the Tatin sisters and a famous baking mistake.
How to make a traditional Tarte Tatin?
A traditional Tarte Tatin is made by caramelizing apples in butter and sugar. The pastry is added on top before baking in the oven.
What is the difference between a tarte Tatin and a classic apple pie?
Tarte Tatin is baked upside down, with the apples directly in the caramel. The classic tart is baked with the pastry on the bottom.
Should apples be caramelized before or during cooking?
The apples caramelize directly in the pan with the sugar and butter. The oven finishes the cooking process.
What is the best variety of apples for a Tarte Tatin?
Reine des Reinettes, Golden, or Boskoop apples are ideal. They hold up well when cooked.
How can you prevent the dough from becoming soggy?
Use very cold dough and press it firmly onto the apples. Turn them over quickly after baking.
Learn more about French cuisine
The complete guide to French cuisine
Traditional French recipes you must try
Discover the secrets of French desserts
The gastronomic meal of the French (UNESCO heritage)